Home, Design, Recipes

Showing posts with label dinner. Show all posts

Tuesday, April 10, 2012

A Lemon Inspired meal

I guess nothing screams spring like lemons. This wonderful fruit is vibrant, acidic and versatile. You can use lemons for savory dishes or desserts, hot or cold, heck it's even used as a cleansing tonic. To welcome spring, I decided to create a meal using this flavorful fruit. On the menu is a shrimp, peas and corn orzo, oven-roasted dover sole and lemon cupcakes.


The oven roasted fish was inspired by a dish Ina Garten had made. In her recipe, Ina used swordfish and a sauce that is similar in taste to tartar sauce. I am not a giant fan of swordfish because the meat is a little tough. I wanted something flakey and soft, and that I can prepare and cook quickly. So, I decided on sole. Also, I love the combination of herbs with seafood. Rather than using tartar sauce, I decided to make a herb sauce that would brighten up this dish and give it a fresh flavor.

Ingredients:
10 pieces of sole (you can use any fish of your choice though another good one is cod)
A bunch of Basil leaves plus 1/4 cup chopped basil (enough for fish and sauce)
1/2 cup mayonnaise
3 garlic cloves
2 tablespoons chopped onion
2 tablespoons cilantro
1 sprig green onion
2 lemons
Salt and pepper

1. Preheat oven to 400 degrees F. 
2. Place a piece of basil inside each fillet and roll the fish to seal it. Place the fish on an oven proof baking dish. 


3. Combine the 1/4 cup chopped basil leaves, mayonnaise, garlic, onion, cilantro, green onion and juice of 2 lemons in a food processor. Season with salt and pepper, then pulse to combine. 
4. Spread 3/4 of the sauce over the fish. Reserve the rest to pour over the finished dish. If prepping this dish in advance, keep the fish and sauce separated in the refrigerator until you are ready to use. Spread the sauce right before you place them in the preheated oven.


5. Bake the fish at 400 degrees F for 18 minutes. Then, switch to broil and cook for another 2 minutes. The cooked fish should be firm to the touch and slightly browned on top. Depending on the thickness and choice of fish, adjust the cooking time accordingly. 

Oven roasted dover sole with herb dressing.
Over the weekend, we had dinner at Osteria La Buca in Los Angeles. It came highly recommended by a friend and the family decided to check it out. It was a very satisfying and enjoyable meal. There was one dish that I particularly enjoyed that night- agnolotti with tiger shrimp and peas. Inspired, I came up with my version of pasta with tiger shrimp and peas. 

Shrimp, peas and corn orzo.


Ingredients:
1 cup peas (I used frozen peas and corn)
1 cup corn
16 oz orzo
1 lb peeled and deveined shrimp
Paprika powder
Salt and pepper
Olive Oil
4 lemons
2 tablespoons chopped mint
2 tablespoons chopped parsley


1. In a pot of boiling water seasoned with salt, blanch the peas and corn for 30 seconds. Remove from pot and set aside. 
2. Prepare orzo according to the instructions on the packaging. I cooked the orzo in the same pot that I had previously used to blanch the vegetables. That way, you don't have to wash another pot. 
3. Season the shrimp with paprika, salt and pepper, one tablespoon of olive oil and the juice of one lemon. 
4. Set the oven to "broil" and place the shrimp on the top rack of the oven. The shrimp will cook quickly, about 8-10 minutes. Since all ovens are different, check the shrimp from time to time. When it turns pink and is firm to the touch, it is cooked and can be removed from the oven.


 5. While the orzo and shrimp are cooking, prepare the lemon vinaigrette. Whisk equal amounts of lemon juice and olive oil together. I used the juice of three lemons. Season with salt and pepper to taste. 


6. When the orzo is done, drain the liquid and combine the orzo, peas and corn in a nice serving bowl. Toss together with the shrimp, chopped mint and parsley, and vinaigrette. The warm orzo will soak up the lemon vinaigrette. I also added some liquid from the cooked shrimp into the orzo to add more flavor. If your orzo seems dry, simply prepare more lemon vinaigrette. 

Although you can make the fish and orzo on separate occasions, the combination of these two dishes work very well together. I think each dish helps enhance the flavor of the other and it brings on a very light and refreshing taste. 

For dessert, I made lemon cupcakes with cream cheese frosting. I used a regular vanilla cupcakes recipe but added some lemon juice for flavor. In conjunction with Easter, I decorated the cupcakes with Easter chocolate eggs and edible green grass. Voila. 

Lemon Cupcake.

Thursday, April 5, 2012

Channeling our inner Julia Child

My friend Kari gave me a copy of Julia Child's "Mastering the Art of French Cooking" last week and we thought we would finally put her recipes to test. I'm sure the recipes are fine, but I have never cooked anything from Julia Child before and the mere thought of it had always left me feeling nervous and intimidated. When Shunsuke saw my copy of the cookbook on the countertop, he loudly asked if I can do this. It is about a thousand pages of instructions with very little pictures. I initially thought it would be so difficult because I don't have a visual of how the dish should end up looking like. But, since I have an extra pair of hands and another brain to toss ideas around, Kari and I faced our fears and attempted to make a meal from Julia Child's cookbook.


Kari was nice to host the dinner at her place. The pictures were taken in her lovely kitchen. On the menu that evening was: fish poached in white wine, sauté vegetables, potato gratin and grand marnier soufflé. We also made a salad to start though it wasn't from Julia's book.


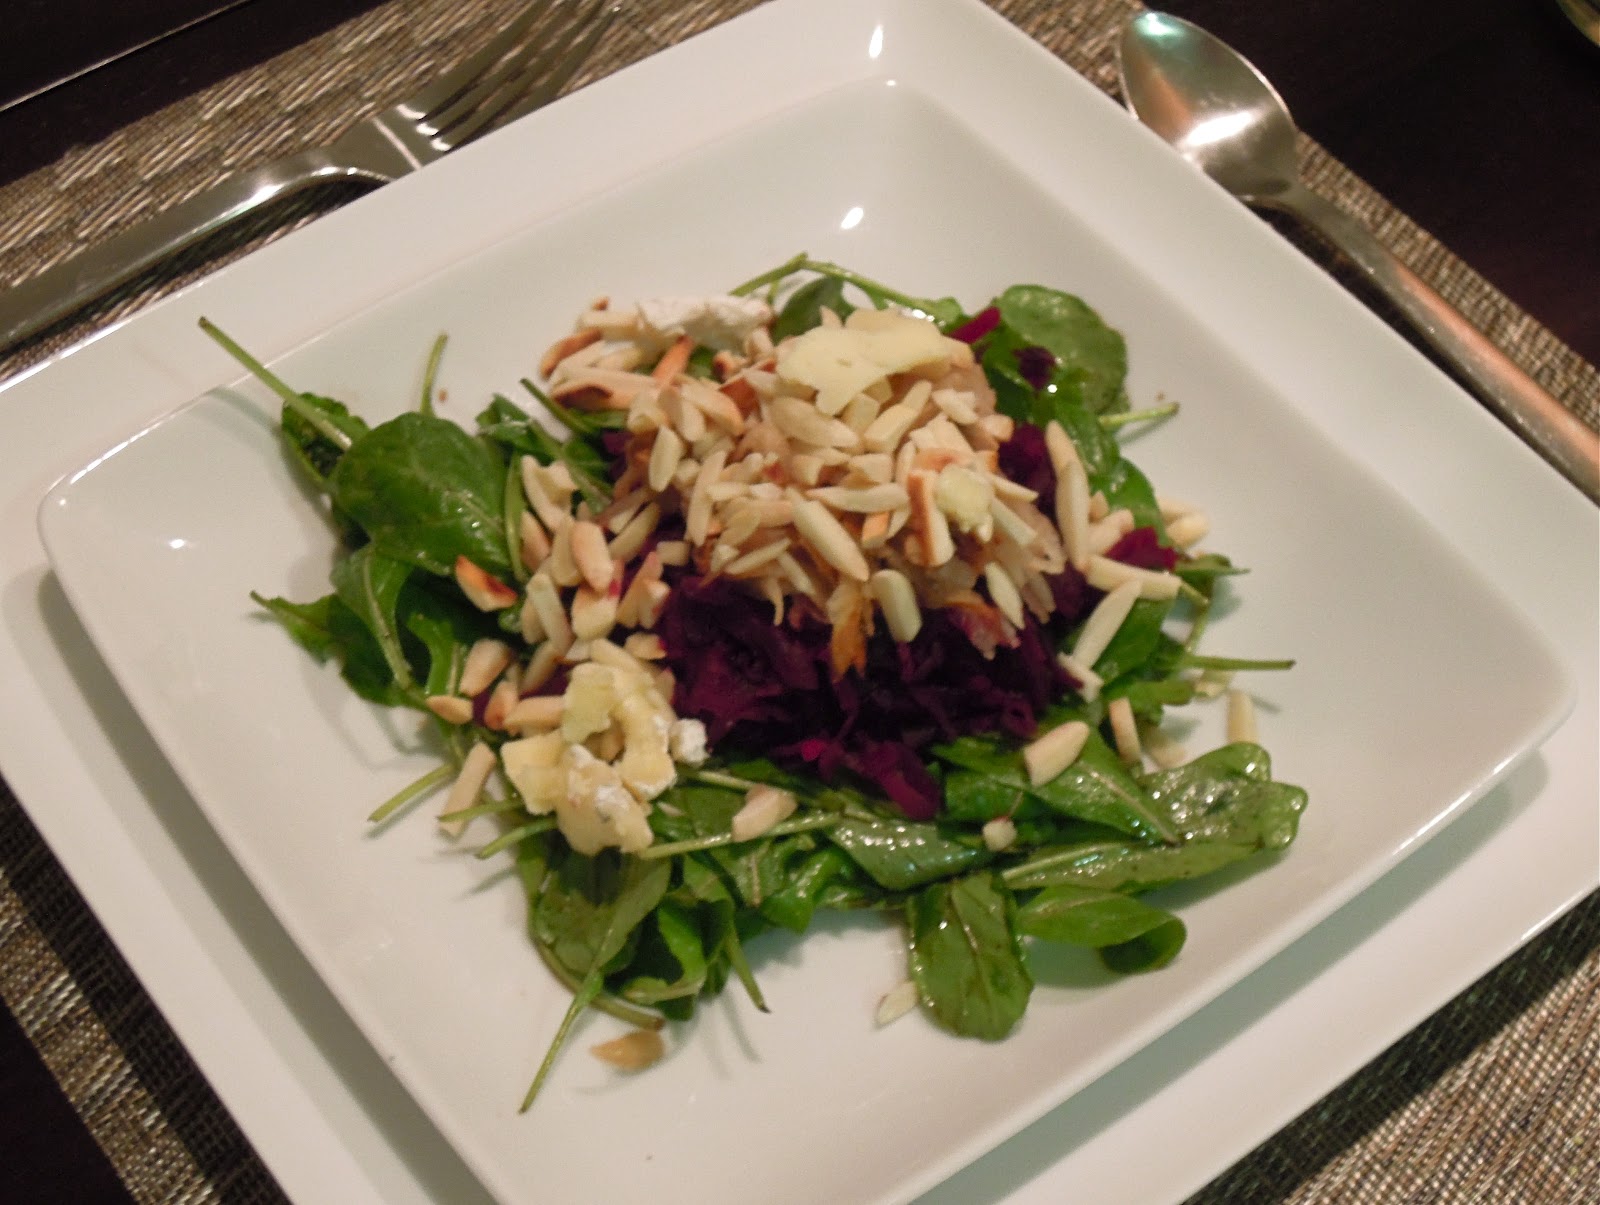
To start, Kari made a beet and pear salad. She roasted the beets in the oven for about an hour and shredded them along with pears. A light vinaigrette to toss the simple salad and topped with slivered almonds and some blue cheese. Big Yum!


Kari cutting the potatoes using a mandolin for our potato gratin.


Finished gratin. Julia Child uses eggs in her gratin which I thought was quite different. It gave the dish a very nice and soft spongy texture. Definitely different from the typical ones with béchamel sauce which tends to be heavier. 


White wine poached fish. It was very simple to make. All you need was fish (we used cod) white wine, water, butter (of course) and shallots. I understand that this may be the traditional French way of poaching fish, but I thought it didn't do much for the fish. The fish had very little flavor and tasted bland. I will make this recipe again with a few alterations, using some herbs and stock to flavor the fish. 


Saute Vegetables- Julienned carrots, fennel, zucchini and yellow squash. The fennel adds a light licorice flavor to the vegetables.


Finished dish. We plated it the best we could. 


Although the fish was a disappointment, the Grand Marnier soufflé was definitely the highlight of the meal. It was light, fluffy and delicious. I have to say that this recipe was much easier than the other soufflé recipes I've tried. It was so good. I'm still dreaming about it.


When I first started cooking this meal with Kari, I thought I would never use Julia Child's cookbook again. The book didn't have pictures of the dishes we are making and the style of which the recipes were written was very different, making it a little harder to follow. But, having made that soufflé and seeing how well it turned out, I changed my tune. It is not as difficult as I thought and I would try more recipes in the future. You just have to get used to her style of writing. Yes, and  I also have to make sure I stock my fridge with butter. Tons of butter because it ain't a Julia Child's recipe if you don't have at least half a stick of butter in there!

Thank you Kari for the book and for hosting the dinner party. It was very fun! Bon Appetit!

Friday, March 23, 2012

Pork Chops, Vegetable Tian and Strawberry Tart

Throughout this past year, I have been religiously subscribing to and reading the Martha Stewart's Food Magazine on my iPad. I love the layout of that magazine on the iPad. I think the folks at MS did a great job. Each monthly subscription comes with a handful of recipes, carefully catered to the season. And with it, how-to videos of some harder to follow recipes. If you've been contemplating on whether to get that application, think no further. It is well worth the price in my opinion (not that you give a crap but I can have my own opinion).  And no, I am not endorsed by MS. But, if they would like to send some free stuff my way, I promise I will be extremely grateful.

I was browsing through my older editions of the MS magazine and stumbled upon a vinegar braised pork chop recipe. It is extremely easy to make and everything cooks in a pot, in the oven. It reminded me of a Chinese dish that also revolves primarily around pork (pork feet specifically) and sweet vinegar that my grandma makes so well. There is some similarities in flavor though the Chinese version was sweeter and the sauce, thicker. And that we put a whole bunch of other stuff in there too (ginger, eggs, etc.)


Vinegar braised pork chops
(Adapted from Martha Stewart Food Magazine)
4 1 inch thick bone in pork chops
8 cloves of garlic, smashed and peeled
1/2 cup rice vinegar
1/2 cup apple cider vinegar
1 cup water
2 tbsp sugar
Vegetable oil
Salt and pepper
  1. Preheat oven to 350 degrees F or 180 degrees C.
  2. Season the meat with salt and pepper on both sides. Sear both sides of the pork chops, about 3 minutes. Perform this in batches if all the meat does not fit into pot at one time. 
  3. Mix together vinegar, water and sugar. Add the mixture to the pork chops and throw in the garlic cloves. 
  4. Braise the pork chops, covered in the oven for about 1 hour. 
  5. Add chopped parsley and serve warm. This dish can be prepared in advance and reheated before serving. 
Alongside the pork chops (which was very tender, by the way), I served vegetable tian. I think we can use some vegetables with all that pork! Vegetable tian is great if some of your guests happened to be vegetarian and you are looking to make something hearty and satisfying. The dish also cooks in the oven, so you can prepare both your pork and vegetables at the same time.

Pretty much all that you need- zucchini, tomatoes, thyme, onion and yellow squash.

Vegetable Tian
(Adapted from Ina Garten)
1 medium onion
2 Sprigs of thyme
2 medium zucchini
2 medium yellow squash
4 roma tomatoes (you may not need all of them, I ended up only using 2)
1/4 cup grated parmesan cheese (you can add more if you like)
Salt and pepper
Olive Oil
  1. Preheat oven to 350 degrees F or 180 degrees C.
  2. In a saute pan, heat olive oil and cook sliced onions with thyme until soft and translucent.
  3. While onions are cooking, slice the zucchini, yellow squash and tomatoes. You want to slice them in equal thickness so they cook evenly.
  4. Add the cooked onions to a baking dish and evenly place the sliced vegetables on top.
  5. Cover the arranged dish with foil and cook in the oven for 30 minutes. Be sure to also season your vegetables with salt and pepper throughout.
  6. Remove from oven and add grated parmesan cheese. Return the dish to the oven, uncovered for another 15-20 minutes until the cheese is melted and the vegetables are cooked. 
  7. Side note - if you have a larger party, just increase the amount of vegetables and cheese proportionately. It may take a couple more minutes to cook. 
Before
After

Some people will call me a cheater bug because I don't make my own pastry shell of any kind. It's a lot of work and honestly, by the time I am done with it (prepping, making and cleaning up), it would have been much more economical to buy a pre-made shell/dough from the store. And they taste great and is always consistent (if you make them consistently...). So, give yourself a break and get the pre-made ones. No one will know better.

Strawberry-Pistachio Tart
1 store bought puff pastry, thawed
1 basket fresh ripe strawberry
2 tsp ground pistachios 
1 tsp sugar
2 tsp strawberry jam + 1 tsp water
2 tbsp pistachio, chopped
  1. Preheat oven to 400 degrees F or 205 degrees C.
  2. Roll the thawed puff pastry into an 10X12 rectangle (I just eye-ball it). I cut 4 strips around the corner of the rectangle and pressed them on top of the sides of the flat pastry. See picture below for an idea of what I'm referring to. 
  3. Bake the puff pastry for about 25 minutes or until slightly golden.
  4. Meanwhile, combine the ground pistachios and sugar. You can ground whole pistachios in a coffee grinder or a food processor. Remove puff pastry from oven and sprinkle mixture onto the pastry. Return to the oven for another 10 minutes. Be sure to check on it, so that the nuts do not get burned. 
  5. Once the puff pastry cools, brush the mixed strawberry jam and water on the crust. Then, generously spread pastry cream onto tart shell. The strawberry jam layer will help keep the crust crisp after you add the pastry cream. Click on the pastry cream link for recipe.
  6. Arrange the sliced strawberries and sprinkle some chopped pistachios on top. 


Finished strawberry and pistachio tart.
Enjoy.


Monday, March 19, 2012

Naomi's birthday, a full on Japanese meal.

There is no doubt my mother-in-law is a great cook. She never fails to whip up anything less than amazing every time we have dinner at her place. If I can describe her style of cooking and her food, it will be fresh, clean and light. It is also visually appealing, with tons of colors and textures. You know how you get that feeling as though a truck has just ran you over after you over indulge? I don't feel that way with her food even though I consciously know I ate a lot. Hmm, I wonder if that is still a bad thing? :P 

She prepares her meal with tons of vegetables and they are always delicious. I have tried making the same dishes and they never quite tasted the same. Now that I'm married to a Japanese man, I feel that it is important to find a balance and continue the ways and tradition of two different cultures and hopefully pass them on to my kids (if I have them). As you continue reading and admiring the food, you will notice I have much to learn. 

We decided to have dinner at home with the family to celebrate Naomi's 2X birthday. It's been a while since we had dinner together at home. We usually celebrate birthdays at a restaurant, but wanted to do something more intimate this time.

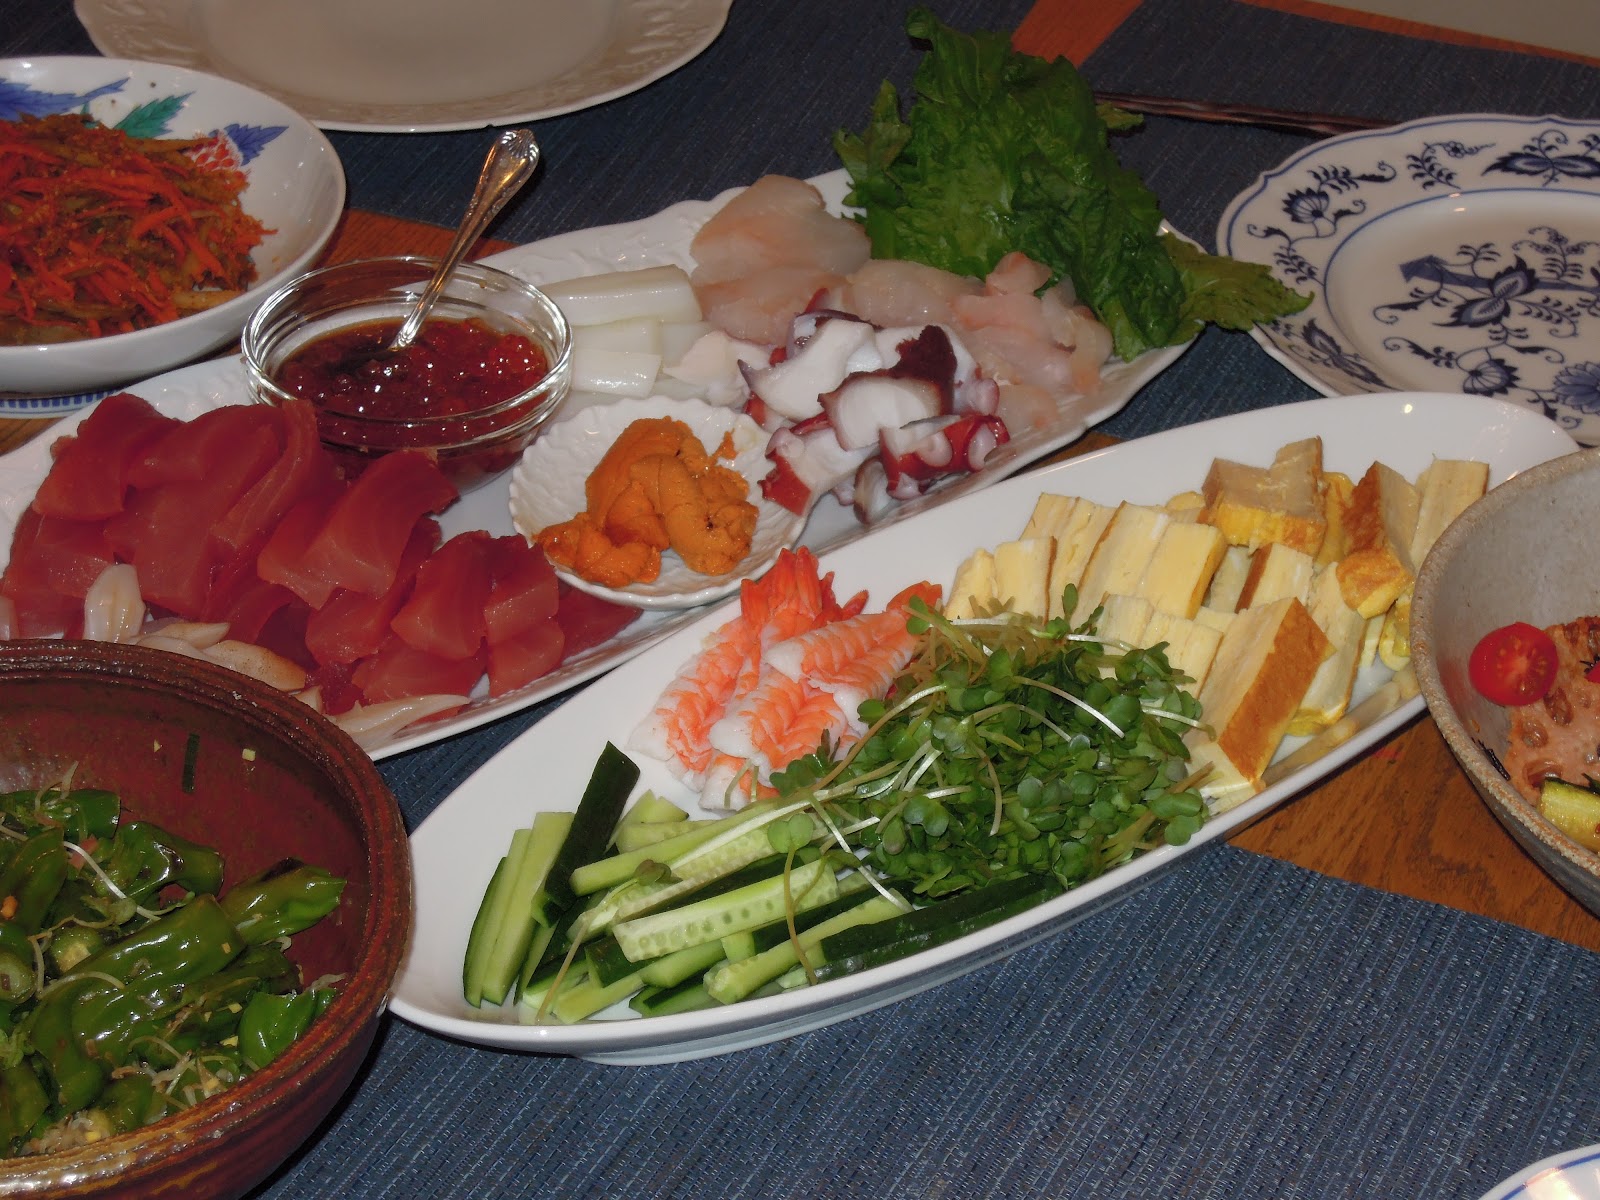
A snapshot of our spread for the evening. 

A salad with shishito peppers and dried baby anchovies. This one packs quite a punch.

I love DIY sushi. My MIL will prepare sushi rice and we get to choose the types of fish we want to wrap with seaweed. It is not only tasty, but a lot of fun too.

Eggplant salad with picked vegetables.

 Spinach salad with sesame.

 Kinpira- made with carrots and burdock root.

 Salad with a mixture of celery, cucumber, red onion, red bell pepper and chicken.

 Since it also happened to be St. Patty's Day, she made a Japanese spinoff of corned beef and cabbage. Hers is minced pork wrapped in cabbage and stewed in sake, dashi and soy sauce. This is one of my favorites for the night.

Steamed dumplings.

My contribution for the evening is a chocolate cake with hazelnut swiss meringue buttercream per the birthday girl's request. Since I can't cook like my MIL, the least I can do is try to bake a cake. 


Happy birthday Naomi-chan and thanks mama, for cooking such a delicious meal!

Monday, March 5, 2012

One Pot Wonder

I am a big fan of one pot meals if you hadn't noticed already. If I only need to use a chopping board, knife, pot and a spatula for the recipe, I'm in. Why? Two simple words. I'm lazy... Is that three?

You don't have to do a lot of dishes in the end and clean up is easy. Plus, one pot meals are great if you need to prepare something in advance. The longer everything sits together, the tastier it gets. It's great for pot lucks and entertaining without the fuss. With most one pot meals, I can just put the ingredients directly into the pot right as I chop them. So, I always set up my prep area next to the pot. No additional plates needed.

I've made this dish a couple times for a few friends and it was a big hit. Although we don't get unbearable cold weathers here in Southern California, it gets a little chilly at night from time to time. I love making lamb stew with couscous during cold, "winter" nights like these.

 You have your fruits, vegetables, beans and meat. All in a pot!

 Yo yo yo, just chop and drop. Uh-huh...

This is what it looks like when you get everything but the kitchen sink in there.

Lamb Stew courtesy of yours truly, serves 4:
1 tbsp olive oil
1 lb of lamb stew meat
1/2 lb merguez lamb sausage *
1 medium onion
3 garlic cloves
1 can garbanzo beans, rinsed
1 28 ounce can whole peeled tomatoes
1/2 cup dried plums
1 cup dried apricots
1 tsp cinnamon
1 tsp dried oregano
1 tsp paprika
Salt and pepper to taste
1 tsp orange zest
* I got the merguez lamb sausage from Whole Foods Market. The lamb sausage is essential in this dish because it contains harissa, a type of hot chili paste. If you can't find lamb merguez sausage but is able to find harissa, use about 1 tbsp of that paste and increase the amount of lamb stew meat.

Directions: Heat olive oil and sear both lamb stew meat and merguez sausage. Add the chopped garlic and onion to the mixture to sauté. Stir in the peeled tomatoes and bring the mixture to a boil. Lower the heat to medium. Add the rinsed garbanzo beans and diced dried apricot and plums. The dried fruits will add sweetness to the dish. Stir in the cinnamon, oregano, paprika and salt and pepper. Let the mixture stew for about 30 minutes over medium to low heat. Before serving, add the orange zest. The zest brings some freshness and acidity to the hearty dish, but do this right before serving. I served my lamb stew with some couscous. You can definitely eat it with pita or some crusty bread.

I add mint, parsley and toasted pine nuts to store bought couscous. A little something something to just plain carbs. I say if you're going to eat carbs, make sure it actually tastes good. Or else you'll be sacrificing calories for nothing.

Final product. You can plate the stew next to the couscous for a simple look or just smother the couscous with lamb stew (pic above). I don't judge. :)

Monday, February 27, 2012

What's for dinner, hunny?

I get that question a lot ever since I started my housewife venture over a year ago. Dinner is almost always ready when my husband steps foot in the apartment. I feel like he's gotten it down to the last few minutes when I'm either reheating the food or plating them, just in time for him to put his briefcase down and change into something comfortable. Some would say, spoiled much? ;)

On the menu tonight: pan seared salmon over a bed of sautéed spinach and a side of cauliflower gratin. Oh, and pea soup. I love to see colors on the plate. It just makes the dish a little more fun to eat.


I always keep a bag of frozen peas in the freezer because it is such a versatile ingredient and can be used in soups, risottos or salads. This time, I decided to make pea soup with some leftover frozen pearl onions that I had from my beef bourguignon dinner a couple weeks ago. You only need a handful of ingredients in this soup - garlic, beef broth, frozen pearl onions, bacon and of course, peas!


I cooked the bacon directly in the pot - that will help render some fat without adding any more oil. Then, I added the rest of the ingredients and brought it to a boil. When all the vegetables are cooked, I pureed the soup with my handy dandy immersion blender. You can also use a food blender but if you love pureed soups like I do, I would suggest that you invest in an immersion blender. With a hand held immersion blender, you can puree the soup directly in the pot, without having to clean another kitchen equipment. In the past, I had always used a food blender. The problem with that is you have to wait till the soup cools  before you can blend it.  I got burned once because I didn't wait for it to cool down and the steam from the hot soup pushed the lid off the blender and I got hot soup all over me. It was not fun. So, personally, an immersion blender is the way to go. My husband got me the hand held Kitchen Aid immersion blender for Christmas a couple years ago. The blending attachment can be easily removed and clean. I find it very useful when making soups and sauces. Of course, you can also use it for smoothies and other stuff that you need to blend.

Before

After
I added some croutons to the soup. Croutons (cubed and toasted bread)

Moving on to the main dish - pan seared salmon with sautéed spinach. With fish, you always want to make sure that you don't overcook it or the meat will become really tough and difficult to eat. Therefore, I always cook it last so that, I don't have to reheat them in the microwave and I can serve immediately. If you have to reheat it in the microwave and the microwave smells fishy after that, simply cut a lemon in half and heat the lemon in the microwave for 10 seconds. That's a trick that I've learned and should get the fishy smell away. 

I sautéed some baby spinach with garlic and olive oil. When the spinach is almost ready, I season it with salt and pepper and added some lemon juice. I learned to cook salmon from my mom. There is no marinade necessary, simply fresh salmon, salt and pepper, lemon and good olive oil. I season the salmon with salt and pepper on both sides, and rub them with olive oil. I used a dry non-stick skillet over medium high heat. When the pan is hot, I lay the salmon skin side down. The heat from the hot pan will give you a nice sear on the skin. When I first learned to cook, I tend to move whatever meat I am making around, thinking that I will burn the meat if I don't. That's so not true. You want to let the meat sear, so it has a nice crusty brown layer on the top. The sear will also help keep the juices in the meat. I sear the salmon for about 3 minutes on each side (depending on the thickness of the salmon). When the salmon is almost ready, I squeeze in some lemon juice. I also made some gremolata to top this dish. Gremolata is, according to Wikipedia, a chopped herb condiment. It's a combination of garlic, lemon zest and parsley. Sounds fancy, but it's really just made out of these three ingredients. 

Fresh Salmon from Whole Foods Market


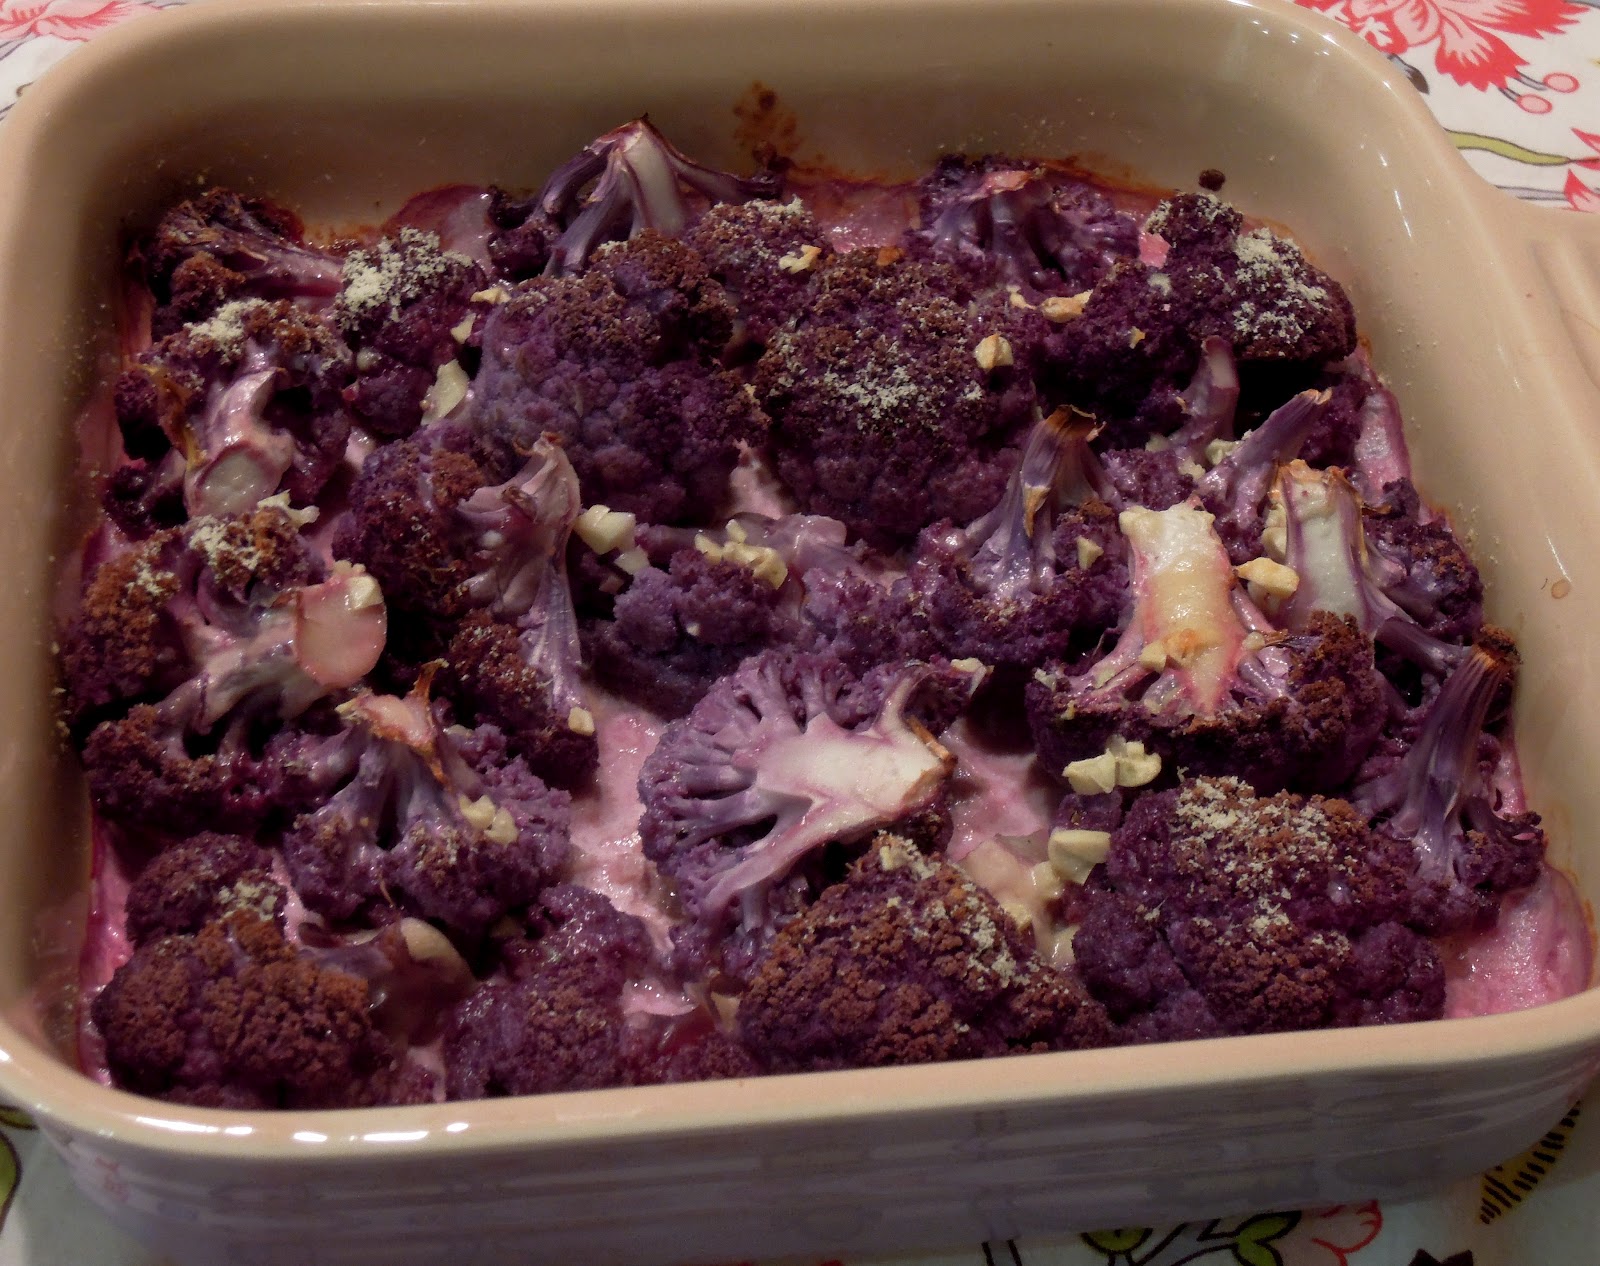
Our little side of cauliflower gratin. Typically, cauliflower gratin is made with béchamel sauce topped with several types of cheeses (gruyere, parmesan or cheddar). My version is slightly lighter and you can make it all in a baking dish. No other pots required. I also decided to use purple cauliflower instead of the typical white ones to give this dish some color. 

I add cauliflower florets (from one head of cauliflower seasoned with salt and pepper and olive oil) to a baking dish and roasted them for about 10 minutes at 380F. For my gratin "sauce", I added 2 cloves of chopped garlic to 1/2 cup buttermilk (if you don't have buttermilk, you can use heavy cream) and together, covered the roasted florets with some grated parmesan. I continued baking the dish for another 10 minutes until the florets are fully cooked through and the cheese is melted. The finished dish adds a nice purple hue to the meal. 


Enjoy...

Wednesday, February 15, 2012

Happy Valentine's Day

It was a little chilly on Valentine's day and I thought of making something that would warm our stomachs for dinner. I finally decided on filet of beef bourguignon from my favorite food network star, Ina Garten. I got this recipe from her very first cookbook, simply "The Barefoot Contessa Cookbook". This recipe is her interpretation of Julia Child's famous beef bourguignon minus the extra stewing time. I followed Ina's recipe closely and it was very easy to make. The only thing that I omitted from the recipe is butter. I think my husband and I can do without the extra fat and calories. I guess without the butter, it isn't really an Ina Garten dish. Maybe this can be in MY cookbook in the future? :P

The sauce was incredibly smooth and velvety even without the butter. I prepared this dish during the day and re-heated it right before dinner. We enjoyed the beef bourguignon with some crusty french loaf that I toasted and rubbed generously with garlic. That added another depth of flavor when we dipped it into the rich sauce. Although this dish really is a one pot wonder, it is distinctly elegant and absolutely delicious. This is definitely a crowd pleaser that can be prepared well ahead of time.


I made a simple side salad to accompany the beef bourguignon. Since strawberries are in season, I added them to a simple tossed salad. Not only does it add color to the dish, the balsamic vinegar pairs well and adds sweetness to the strawberries. It was almost like a palette cleanser to the richer beef bourguignon.


The night before, I made some red velvet batter that I baked in heart-shaped baking molds (following the Valentine's Day theme). I got the red velvet recipe from my recently purchased Magnolia Bakery cookbook. Magnolia Bakery tops their red velvet cakes with a creamy vanilla frosting. However, I decided to use cream cheese because personally, I love red velvet cakes best with cream cheese frosting.  


I piped a simple rose design on the cake, making sure I topped it generously with cream cheese frosting. I added a simple heart shaped macaron cookie on the side to finish the cake.


Finally, it was time to eat! Overall, it was a relatively simple meal to make and the results are amazing. I hope you will try this if you decide to make something special without a whole lot of fuss.

Happy Valentine's Day!


Recipe for vanilla cream cheese frosting, courtesy of yours truly:

2 8ounce cream cheese packages, room temperature
1/2 stick unsalted butter, room temperature
1 tbsp vanilla
4 cups powdered sugar

Beat the cream cheese, unsalted butter and vanilla with a paddle attachment for 1 minute. Do not whip. Slowly add powdered sugar to the creamed mixture a cup at a time beating until smooth. If the batter is too thick, add some milk. If the batter is too thin, simply add more powdered sugar.